.jpg)
Introduction
The TranslationOS connector for Adobe Experience Manager lets you entrust Translated with the professional or automated translation of your AEM content, without exporting files, sending emails or switching between tools.
You start a translation order from inside AEM. The connector sends your content to TranslationOS, where it is translated by Translated’s AI (Lara), by professional linguists, or by a combination of the two, depending on the service type you choose. Translated content is delivered back into AEM automatically, with structure, references and metadata preserved.
The connector is a plugin installed into your AEM Author environment. It supports AEM as a Cloud Service and AEM on-premise.
What you can translate
-
Pages, including their child pages and linked references.
-
Experience Fragments, the reusable cross-channel content blocks.
-
Content Fragments, the structured presentation-independent content. Individual fragments can be included or excluded using the Translate checkbox.
-
Tags, meaning taxonomy and metadata labels.
-
Forms, meaning AEM form content.
When you add a page to an order you can also include its child pages and its references, so an entire content set is translated in one go.
Support
The onboarding process varies depending on your needs, but the following steps are a helpful guideline:
-
We provide the connector package for your AEM version, and, for AEM as a Cloud Service, the credentials your build needs to retrieve it.
-
Your development or operations team installs the connector into your AEM Author environment.
-
We provide your TranslationOS API endpoint and API key, which you enter in the connector settings.
-
You agree with Translated on the required service levels, also known as service types. We then configure these on your account.
-
We are ready to receive, process and deliver your translation requests.
Requirements
|
Item |
Requirement |
|
AEM as a Cloud Service |
Fully supported (AEMaaCS) |
|
AEM on-premise |
AEM 6.5.21 or later |
|
TranslationOS account |
An active account with an API endpoint and API key, provided by Translated |
|
Connector package |
Provided by Translated for your AEM version |
|
AEM account |
An account with access to the content you want to send for translation |
Setting up the connector
Installing the connector
Installation is handled by the team that manages your AEM deployment. The procedure depends on your environment.
AEM as a Cloud Service. The connector is distributed as a Maven artifact and built into your Cloud Manager pipeline. Your development team adds the Translated repository and the connector dependency to the project, embeds the package in the all project, and provides the repository credentials as a pipeline secret. Translated supplies the artifact coordinates, the repository URL and the credentials, and will walk your team through the change during onboarding.
AEM on-premise. Download the connector package supplied by Translated, then install it through AEM Package Manager on your Author instance at https://{author-host}/crx/packmgr/index.jsp. Upload the package and click Install. The package shows a "Last installed" time once installation completes.
Connecting to TranslationOS
Once the connector is installed, connect it to your TranslationOS account.
-
Log in to AEM Author.
-
Go to Tools > Cloud Services and open Translated Connector Settings.
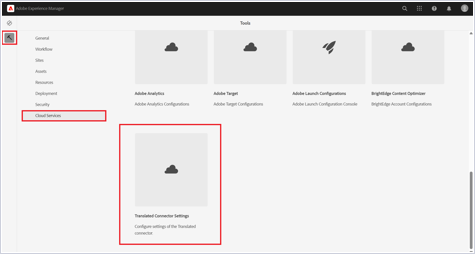
Opening the connector settings from the Tools menu
-
On the General tab, enter the endpoint URL and the API key provided by Translated, then save.
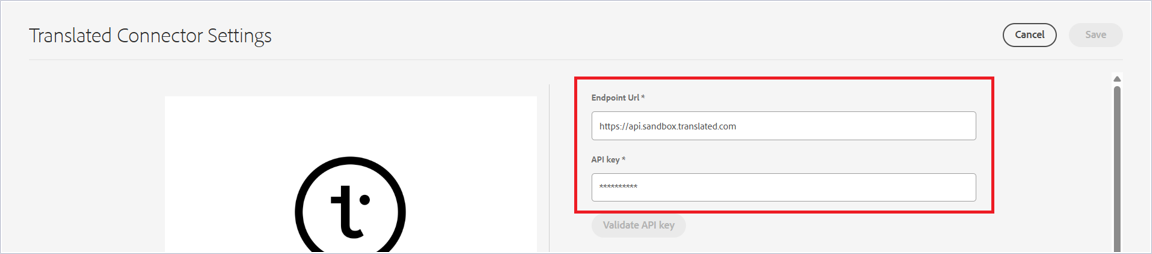
Entering the TranslationOS endpoint and API key
-
Click Synchronize to load the languages and service types available on your account.
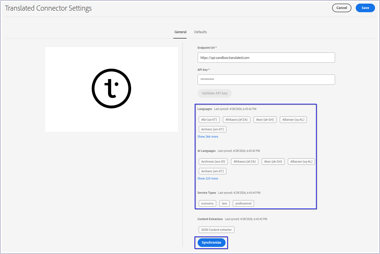
Synchronizing languages and service types from your account
Synchronize again whenever new languages or service types are added to your account.
Setting defaults
The Defaults tab pre-configures the choices your authors see most often, so placing an order becomes a matter of reviewing and submitting.
|
Synchronize first The Defaults dropdowns are populated from your account. Run Synchronize on the General tab before configuring defaults, and again whenever your languages or service types change. |
Shortlists control which source languages, target languages and service types appear in the order wizard. Leave a shortlist empty to show every option available on your account.
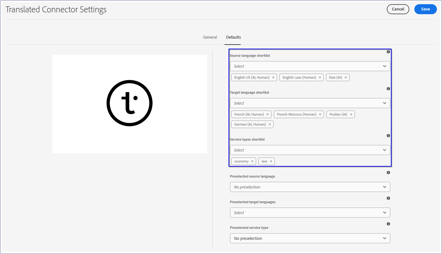
Shortlists limiting the options offered to authors
Preselected values determine which option is already chosen when the wizard opens. Choosing No preselection leaves the field blank.
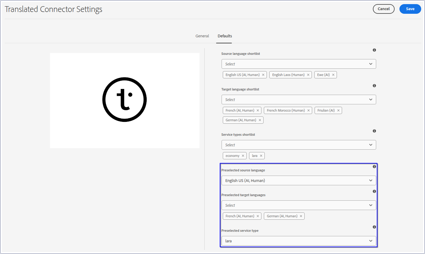
Setting the values preselected in the order wizard
The two settings work together:
-
Preselected dropdowns only offer values that are in the matching shortlist.
-
Removing a value from a shortlist clears any preselection that is no longer valid when you save.
-
Set your shortlists first, then your preselected values.
The result is an order wizard that opens pre-filled.
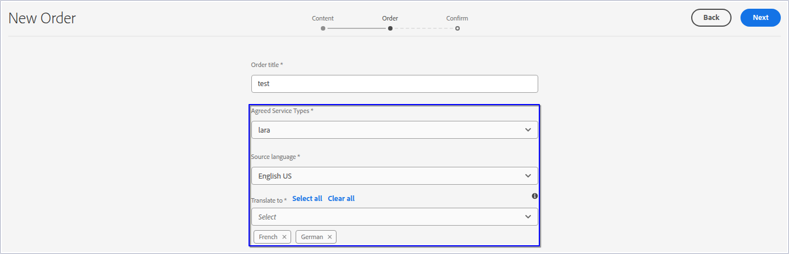
The order wizard with defaults already applied
Configuring a proxy
If your AEM environment sits behind a corporate firewall, you can route the connector’s outbound traffic through a proxy. This step is optional.
-
Open the Proxy tab.
-
Tick Enable Proxy.
-
Fill in the host and the endpoint. Both are required.
-
Fill in the authentication details if your proxy requires them. These are optional.
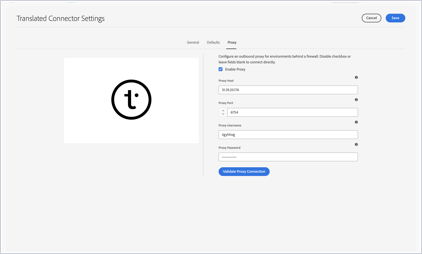
The proxy configuration fields
-
Click Validate Proxy Connection, then save.
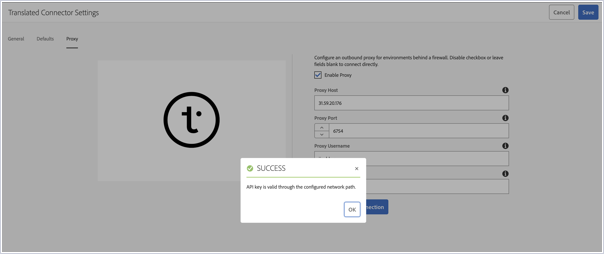
A successful proxy validation
To stop using the proxy, clear the Enable Proxy checkbox.
Using the connector
Placing a translation order
-
Go to Tools > General > Translated.
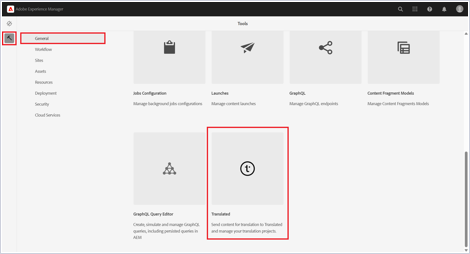
Opening the connector dashboard
-
Click New Order and add your content: pages, Experience Fragments, Content Fragments, tags or forms.
-
Use Include Children to add child pages, and Add References to add linked content. See "Including references" below.
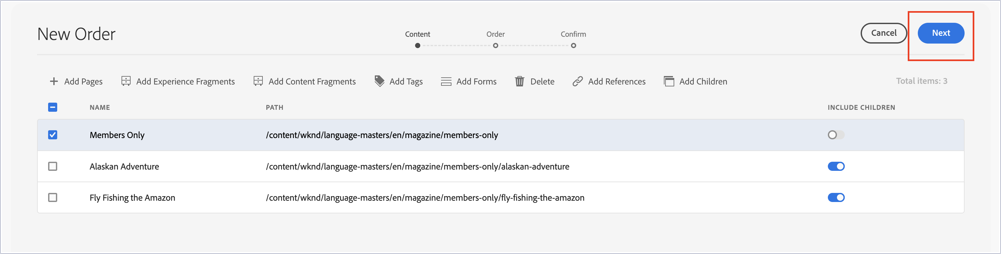
Adding content to an order
-
Click Next.
-
Add the order title, the service type, and the source and target languages. You can also add instructions or reference URLs to help the translators, and fill in the purchase order and cost center fields if your organisation uses them.
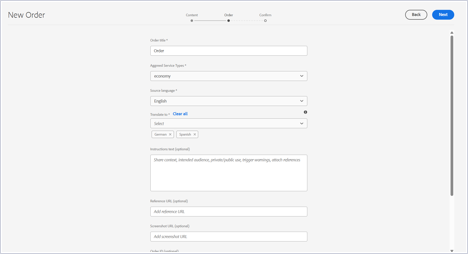
Choosing languages, service type and order details
-
Review the summary on the Confirm step.
Reviewing the order before submitting
-
Click Confirm and create order.
One order is created per target language. Orders are processed asynchronously, so you can carry on working in AEM while they run.
Other ways to start a translation
From the Sites console: select one or more pages, then use Translate with Translated in the header. You can choose whether to include references.
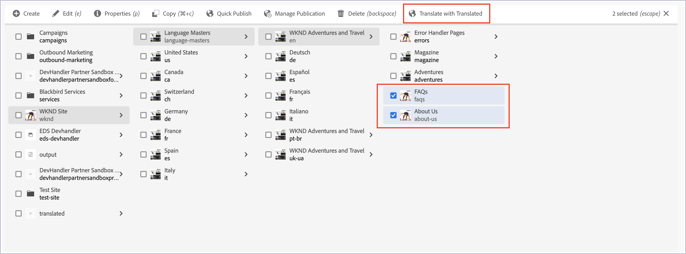
Starting a translation from the Sites console
From the page editor: use Translate with Translated in the Page Information panel.
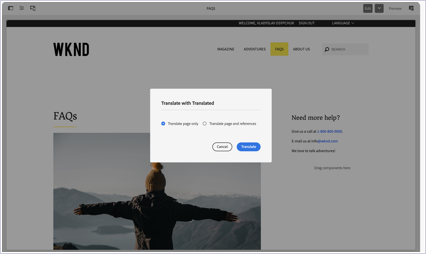
Starting a translation from the page editor
Including references
The Add References action finds the content your selection depends on, so nothing is left untranslated. It discovers references placed on the page itself and references defined on the page template, which is what surfaces the site header and footer Experience Fragments that AEM injects through the template structure.
References are classified as pages, Experience Fragments, Content Fragments or form dictionaries. Only translatable references are offered: an item must sit below a language root, and its language must match the language of the item you are translating. Form dictionaries are exempt from the language match. External URLs are never included.
Add References is available when pages are selected and when Experience Fragments are selected.
The confirmation dialog lists everything that was found, with a type icon, a title and a repository path for each item. You can remove individual references before committing, and a counter shows how many remain. Long paths are shortened, and clicking one expands it so you can read or copy the full value. Only the references left in the list are added to the order.
Monitoring your orders
The Dashboard lists all your orders, one per target language.
-
Use Refresh and the status filters to find the orders you need.
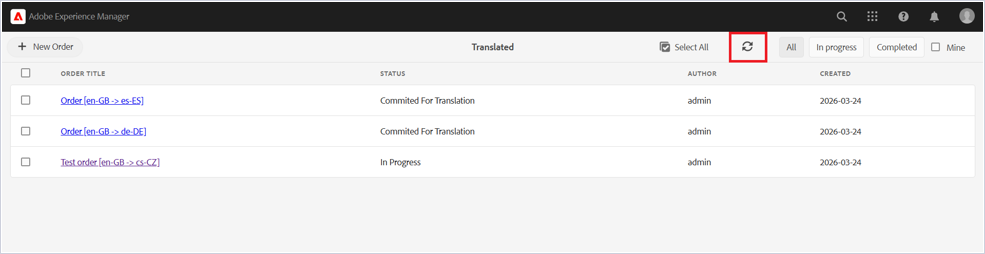
The order dashboard with status filters
-
Open an order to see its details, including a direct link into the filtered request list in TranslationOS.
-
For human translation, you can download the Preview, an HTML rendering of the page with its resources inlined. This is sent to the translators as context.
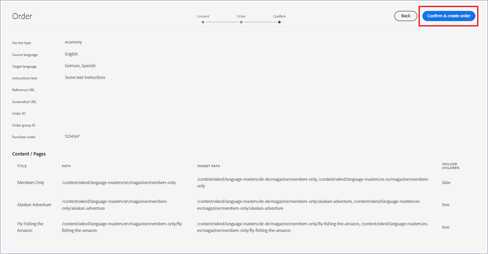
Order details, with the preview available for download
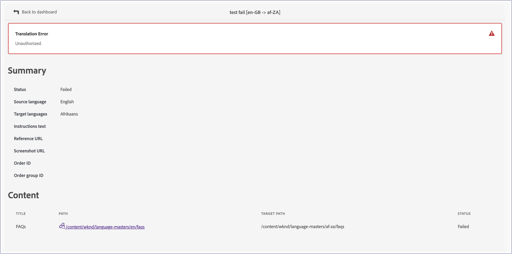
If a job cannot be processed, it appears with a Failed status and an error message explaining what went wrong, so it can be corrected and resubmitted.

A failed job showing its error message
Receiving translated content
Translated content is delivered back into AEM automatically as each order completes. Completion notifications are sent per submission group, so you receive one notification for an order rather than one per item.
You can configure where translated content is written for each locale. Translated will set this up with you during onboarding.
FAQ
Which AEM versions are supported?
AEM as a Cloud Service is fully supported. For AEM on-premise, the connector requires AEM 6.5.21 or later.
Can I translate only part of a Content Fragment?
Content Fragments can be included in or excluded from translation using the Translate checkbox.
Do I have to add linked content to an order by hand?
No. Use Add References when building the order. It finds linked pages, Experience Fragments, Content Fragments and form dictionaries, including those defined on the page template, and lets you remove any you do not want before submitting.
What happens if a job fails?
The job appears on the dashboard with a Failed status and an error message describing the cause. Correct the underlying issue and place the order again.
Can the connector work behind a corporate firewall?
Yes. Use the Proxy tab in the connector settings to configure an outbound proxy, and validate the connection before saving.