Introduction
The TranslationOS connector for Contentstack makes it easy to entrust Translated with the professional or automated translation of your entries, saving you the hassle of importing and exporting content or switching between tools.
This connector is event-based, meaning it is triggered by specific actions. To learn which actions trigger the connector, see the section Requesting translations.
Support
For general questions about functionality, our dedicated support team can be reached at info-tos@translated.com.
If you need technical information or you’re ready to integrate your Contentstack instance with TranslationOS, feel free to reach out to us at api@translated.com for assistance with onboarding.
The onboarding process may vary depending on your needs, but the following steps are a helpful guideline:
-
Translated will ask you to provide a stack API key and a management token (see below for instructions to retrieve them).
-
Translated will enable you to test the connector in sandbox mode, which means that you will get back machine-translated content to test the user experience.
-
You will agree with Translated on the required service levels, also known as service types. Translated will take care of configuring the connector for you.
-
We will be ready to receive, process and deliver your translation requests!
Setting up the connector
You will need to retrieve the following three pieces of data from Contentstack and communicate them to Translated. We will then complete the connector configuration for you. With that done, you’ll be ready to set up the workflow that you’ll use to send your entries for translation.
To begin, log in to Contentstack with an admin account.
Generating a management token and retrieving the stack API key
To generate a management token and retrieve the stack API key, navigate to Settings > Tokens, select Management Tokens, then click + Management Token.
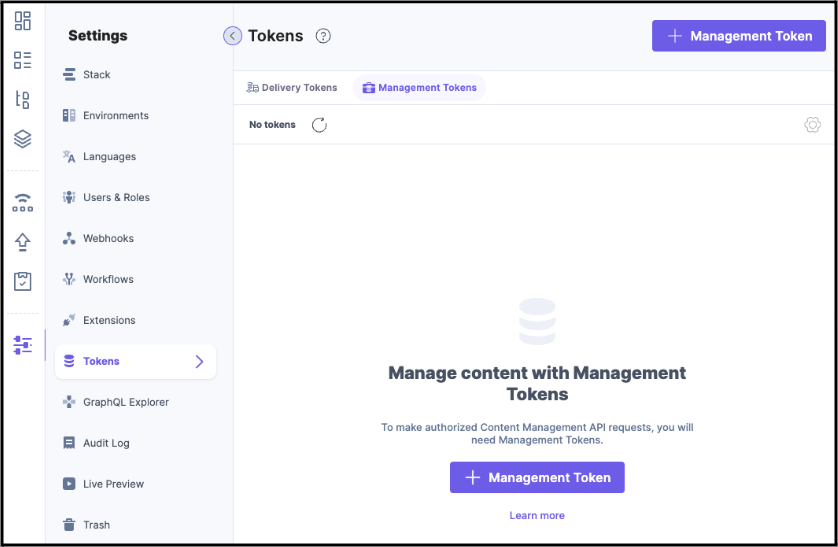
Give the token a name and (optionally) a description, grant both read and write permissions, select Never under Expiry, then click Generate Token.

Copy the stack API key and management token (the management token cannot be accessed again), then click Done and send the API key and management token to us.
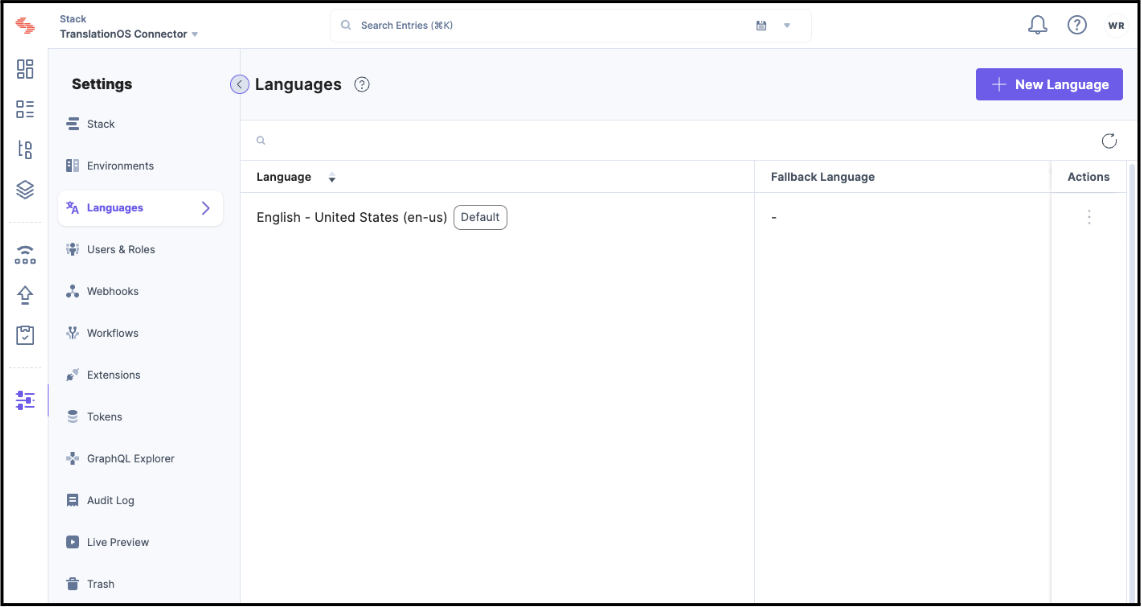
Configuring the target locales
The target locales into which entries may be translated are determined by the globally-enabled locales. Set these by navigating to Settings > Languages, clicking + New Language, configuring the new locale as required, making sure to select specific variant where appropriate, and clicking Add.
Send us a screenshot/list of all your configured source and target languages. See this FAQ.
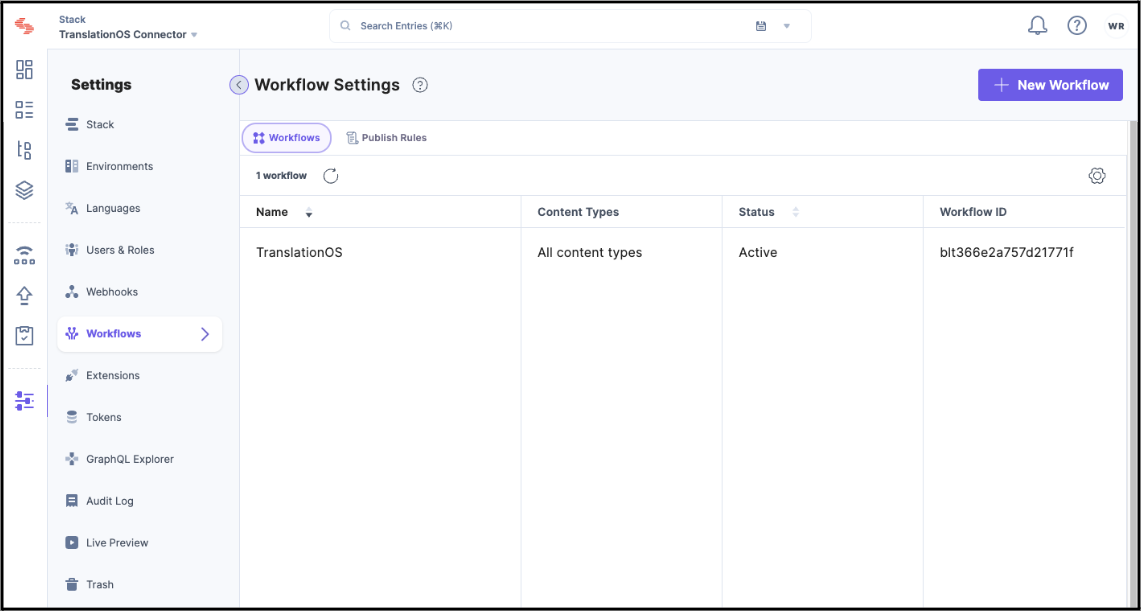
Creating a workflow
If you don’t already have a workflow set up, navigate to Settings > Workflows, click + New Workflow, give the workflow a name and (optionally) a description, specify the in-scope content types, then follow the steps below.
If you already have a workflow set up, you will need to edit it.
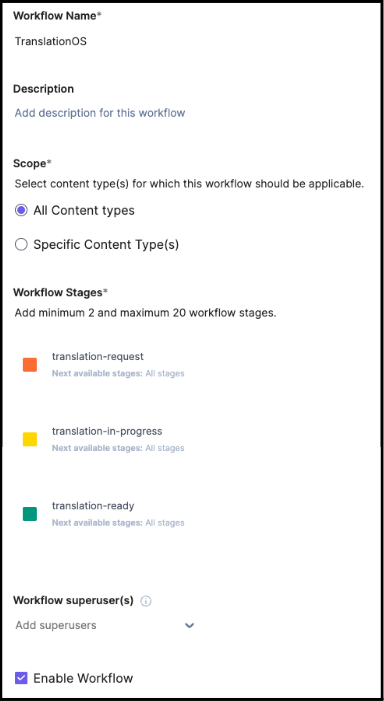
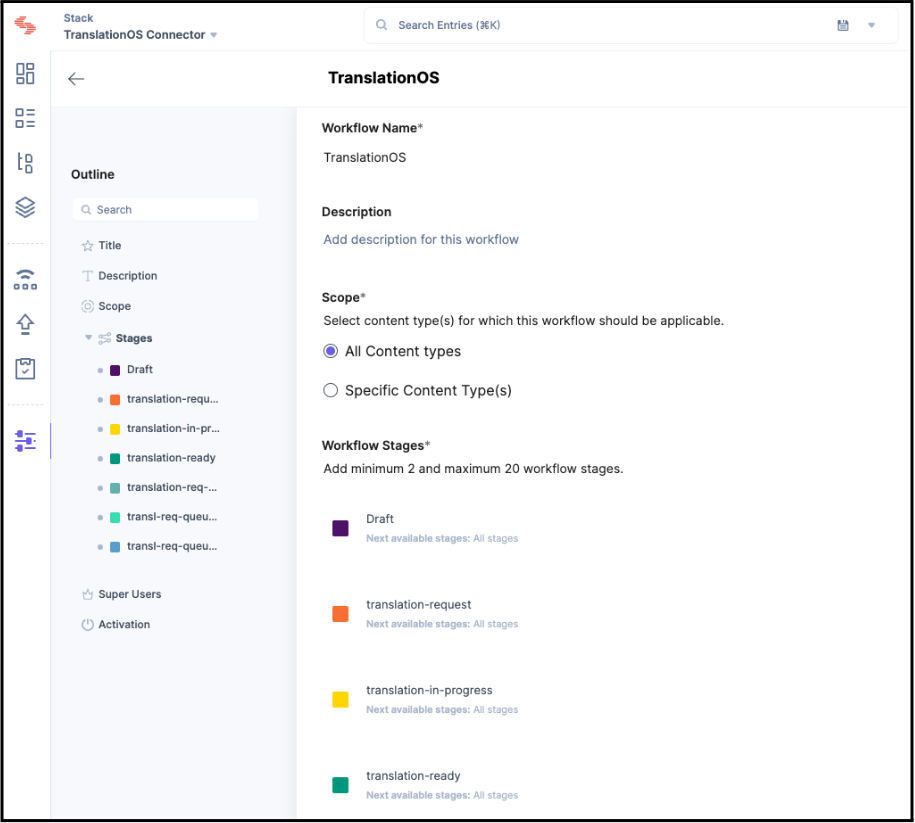
In both cases, proceed by configuring the workflow stages as follows:
-
Three stages must be consecutive and will be used by the connector for translation requests, in-progress translations and completed translations.
-
The second and third stages, namely the equivalents of the translation-in-progress and the translation-ready stages in the screenshot below, must be configured as next available stages for all other stages.
-
All users/roles must be permitted to transition between these stages.

You may add any workflow superusers at this point, then enable the workflow and click Save.
Once you’ve set up a new workflow or altered an existing one that you’ll use to process translations, send us a screenshot. See this FAQ.
Setting up a webhook
Before configuring the webhook that triggers the connector, Translated will provide you with an API key.
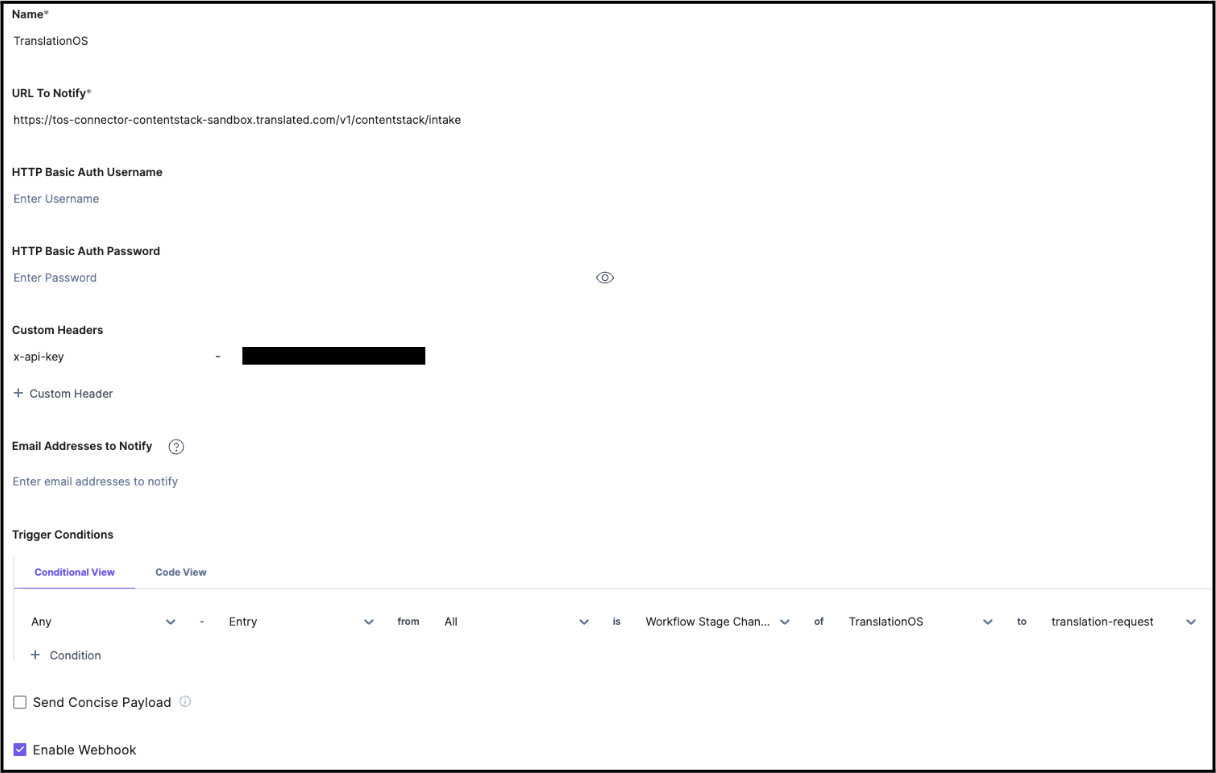
To set up the webhook, navigate to Settings > Webhooks, click + New Webhook, give the webhook a name and specify the URL to notify, depending on whether you’re in the testing stage (sandbox) or ready for production:
-
sandbox: https://tos-connector-contentstack.sandbox.translated.com/v1/contentstack/intake
-
production: https://tos-connectors-queues.translated.com/connectors/contentstack
Leave the HTTP basic auth fields empty, add the x-api-key custom header with the environment-appropriate API key provided to you by Translated, and insert any notification email addresses.
Now we’re ready to set up the trigger conditions. The webhook must be triggered when the workflow stage of an entry changes to the first of the three consecutive stages configured for the connector, i.e. the one used to request translation.
To complete the configuration, untick Send Concise Payload, tick Enable Webhook, and click Save.
Using the connector
Requesting translations
To send an entry for translation, its content type must be included in the workflow created here.
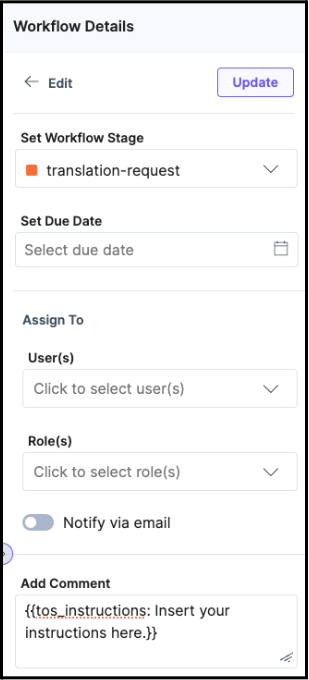
To trigger the connector, set the entry’s workflow stage to the first stage of the three used by the connector. This must be done with the master language active.
You can include instructions for translators when submitting an entry for translation by adding a comment when setting the workflow stage by using the syntax {{tos_instructions: <insert instructions here>}}. These instructions are displayed in Matecat, our CAT tool, for translators’ reference.
To choose a service type other than the default, see this FAQ. To select only specific target languages, see this FAQ. To specify custom invoicing information, see this FAQ.
As soon as you save the workflow stage changes, the connector is triggered, by default submitting a request to TranslationOS for each language that’s active on Contentstack, with the master language as the source language. To select specific target languages, see this FAQ. It does this for all referenced entries as well, scanning for such entries until no more are found. Only unique referenced entries are ingested.
Once the translation is in progress, the entry’s workflow stage is automatically moved by the connector to the second of the three stages used by the connector. A comment is also added to the workflow with the information you need to monitor the request on the TranslationOS dashboards.
Receiving the translated content
Once the translations have been completed and delivered, the connector automatically changes the workflow stage in the master language of the entry to the final of the three stages used by it.
Cancelling translations
Given that the connector is event-based, moving an entry into the initial workflow stage triggers immediate intake. As soon as translation is in progress, if you wish to cancel it, you’ll need to get in touch with us.
FAQ
How do I track my assets in TranslationOS?
TranslationOS uses abstract concepts like content ID, order ID and order group ID to map your content. The values for these fields change depending on the source platform. To retrieve a Contentstack entry in TranslationOS, use the Requests or Content views in TranslationOS and search by any of the values in the table below.
|
TranslationOS ID |
Contentstack value |
|---|---|
|
Content ID |
<entry ID> |
|
Order ID |
<entry title> if there are no referenced entries, otherwise <referenced entry title> |
|
Order group ID |
<entry title> if there are no referenced entries, otherwise <main entry title> |
Where are the languages configured for a stack provided?
In the relevant stack, navigate to Settings > Languages.
Where can workflow settings be found?
In the relevant stack, navigate to Settings > Workflows, then select the relevant workflow to see further details.
How can I specify a service type?
To select a service type other than the default for a particular request, you need to create a dedicated workflow stage with the same name as the first of the standard three stages, followed by a hyphen and the service type name.
For example, if the first workflow stage is called translation-request, the stage to request the urgent service type must be named translation-request-urgent. By moving an entry to this workflow stage, the connector will request the urgent service type and advance the workflow as normal.
How can I select target languages?
You can add a comment when changing the workflow step, inserting a tag for each desired target language.
For example, inserting {{locale:de}} {{locale:fr-fr}} submits a request for German and French (France) only. The locale codes must match those configured on Contentstack.
How can I specify a custom purchase order or cost centre?
You can add a comment when changing the workflow step, inserting a tag for each value: {{tos_purchase_order: custom purchase order}} and/or {{tos_cost_center: custom cost centre}}.