Introduction
The TranslationOS connector for Salesforce Knowledge makes it easy to entrust Translated with the professional translation of your articles, saving you the hassle of manually importing and exporting content or switching between tools.
This connector is event-based, meaning it is triggered by specific actions. To learn which actions trigger the connector, see the section Using the connector.
Support
For general questions about functionality, our dedicated support team can be reached at info-tos@translated.com.
If you need technical information or you’re ready to integrate your Salesforce instance with TranslationOS, feel free to reach out to us at api@translated.com for assistance with onboarding.
Setting up the connector
The connector setup consists of 6 steps that are typically completed in 30 minutes:
-
Installing the connector package
-
Creating and configuring a connected app for authentication
-
Configuring the custom metadata
-
Configuring the translatable content and target languages
-
Configuring the integration user and granting permissions
-
Enabling the connector UI
The following sections detail the necessary actions for each step. You will need support from your Salesforce system admin, or any competent admin user.
Installing the connector package
-
Visit the package installation URL. The connector is not available on AppExchange; it is generated from the build in our organisation’s package manager.
-
Log in using credentials associated with the organisation for which you want to install the connector.
-
Select Install for All Users and click the Install button.
Creating and configuring a connected app for authentication
This step is required to manage the authentication between Salesforce and TranslationOS. To begin, create a connected app:
-
Go to Setup.
-
Type App Manager in the Quick Find box and choose App Manager.
.png?cb=58e92ca8eca1ebd3271c65edc4f94f38)
-
Click on New Connected App.
.png?cb=1a88807d7150a4341ddb05e05c3f26bd)
Once the app is created, configure the app by providing the basic information requested, then configure OAuth, as follows.
Basic information
-
Set the Connected App Name to a meaningful name, e.g. TranslationOS.
-
Enter a unique API Name. It is auto-generated based on the Connected App Name, but it can be customised.
-
Provide a Contact Email for app administration.
.png?cb=4f3526130cab83e4d4ab50df1a146237)
OAuth settings
-
Go to API (Enable OAuth Settings) and tick Enable OAuth Settings.
-
Set the Callback URL to the required endpoint.
-
In Selected OAuth Scopes, add Full access (full). It is highly recommended to grant the full access scope to avoid unexpected behaviour. However, as an alternative and as a bare minimum, you must grant whichever scope includes the Manage user data via API (api) scope.
.png?cb=fdb53d6164f3df39820670f6173c4fb4)
After configuring the app, you need to retrieve the API key and secret, which you must communicate to Translated to complete the configuration.
.png?cb=94ed9cd700872663ddc2db6ad79e02fd)
-
Go to App Manager in Setup.
-
Locate your Connected App in the list.
-
Click View next to the app’s name to open its details.
-
In the Connected App details page, click Manage Consumer Details to reveal the API key and secret.
.png?cb=e372f97afb6cc41b3f661027ddb57133)
.png?cb=cdd0e684ad9f7969745568dc365bbab8)
Configuring the custom metadata
This step is required to ensure, amongst other things, that the translated content is delivered correctly to the desired Salesforce organisation.
To begin, retrieve the Salesforce organisation ID that you wish to connect to TranslationOS.
-
In the Quick Find box on the left side of the Setup page, type Company Information.
-
Click on Company Information under the Company Settings section.
-
On the Company Information page, scroll down to find the salesforce.com Organization ID. This is a unique 15-character alphanumeric identifier specific to your Salesforce instance.
.png?cb=6e7f9bc5af174bb6a5170430dffd3b9c)
Once you have the organisation ID, complete the metadata configuration as follows:
-
Ask Translated to provide the sandbox and production API keys for your account.
-
Go to Setup > Custom Metadata Types.
-
Select ApiConfiguration and click Manage Records.
-
Click New to create a new configuration, then populate the fields as per the table below.
|
Field name |
Example value |
|
Label |
Production |
|
ApiConfiguration Name |
Production |
|
API Type |
TranslationOS |
|
Org type |
Production |
|
Endpoint |
https://api.sandbox.translated.com/v2/translate (Main Path) |
|
Callback Endpoint |
http://tos-connector-salesforce.sandbox.translated.cloud/v1/delivery |
|
API Key |
[Ask Translated for your sandbox and production API keys] |
|
Credentials |
dot_srl:0.3pkplvlspew1718290 |
|
Endpoint ServiceType |
|
|
Endpoint Languages |
|
|
Customer_Id |
00Dbl000000ZOib |
|
Endpoint_Cancel |
Note: The URLs in the above table point to the sandbox environment, which we recommend using to run the first connectivity tests. Once you are ready to move to production, simply remove the subdomain sandbox from each URL. Use the sandbox API key first to do the connectivity test and, when you are ready, replace it with the production API key.
Configuring the translatable content and target languages
Once you have completed the app configuration, you need to configure which fields are translatable and which languages can be selected.
The connector allows you to request translations into every language supported by the Salesforce Knowledge app, even if they are disabled. It is, however, possible to blacklist languages to prevent their selection when placing orders.
To do so:
-
Go to Setup > Custom Metadata Types.
.png?cb=a5df1371564a35b0a7dd587706a4f546)
-
Select Blacklisted Language and click Manage Records.
-
Click New to create a configuration, populating the fields as follows:
-
Repeat the steps above to add configurations for each target language that needs to be blacklisted.
To configure the translatable fields:
-
Go to Setup > Custom Metadata Types.
-
Select TranslatedField and click Manage Records.
-
Click New to create a configuration, populating the fields as follows:
.png?cb=9dcb950bc0d61451dc801314b2b3eced)
-
Repeat these steps for each field requiring translation in various contexts, e.g. Answer__c, Question__c, Title.
-
The exact API Name of each field is required to send the data correctly to TranslationOS. Having the correct API Name ensures precise identification of the fields for translation, preventing errors when transmitting data to TranslationOS.
Configuring the integration user and permissions
To use the connector, you will first need to configure a user that will be impersonated by the integration to submit translation requests and create translated articles. Then, you will need to grant the desired users the rights to use the connector.
The TranslationOS connector for Salesforce Knowledge uses three sets of permissions:
-
TranslatedAbilityTranslationRequest – This allows users to create and manage translation requests. This permission is required to use the connector.
-
TranslatedKnowledgeAutoPublish – This optional permissions set grants the right to tick the Autopublish tick box when placing an order to automatically publish any translated articles at delivery.
-
TranslatedIntegrationPermissionSet – ****Use this permission set only for the integration user. It is required to perform the actions required by the integration.
Once a regular user is granted the right to use the connector in general, the Salesforce system admin is free to restrict the usage of the connector to specific articles by hiding the UI elements for certain users or using different combinations of permission. Please ask your Salesforce system admin for advice on how to fine-tune the user rights.
To create the integration user:
-
Go to Setup.
-
In the Quick Find box, type Users and select Users.
.png?cb=84b4fe73b9f4b3d1efc5de842b00660b)
-
Click New User to start creating a new user account.
.png?cb=fefebda58462b37d641bc928d4b443e6)
Fill in the necessary information:
-
Name: Choose a representative name, e.g. TranslationOS User.
-
Username: Enter a unique username with the format integration@yourdomain.com.
-
Email: Use a valid email address to receive notifications and alerts.
-
Alias: Choose an alias, e.g. IntUser.
-
Profile: Assign a profile that grants the appropriate permissions to execute integration tasks. After creating the integration user, assign it the Minimum Access - API Only profile to ensure it can operate solely through the API.
-
User License: Set to Salesforce or another suitable license based on the integration’s needs.
.png?cb=10aa429e08bd01eac27b736ce50d0319)
Enabling the connector UI
Once the general configuration is completed, you will need to enable the UI before you can allow your users to start using the connector.
Adding the bulk translation request button to the Knowledge list view
-
In the Setup menu, click on Object Manager.
.png?cb=7c825c5fd8063d4e0007d1c89f00b845)
-
In the Object Manager search bar, type Knowledge.
.png?cb=cc06b6ff7fd97844a42ca1febea07f03)
-
Click on the Knowledge object to open its settings.
-
Scroll down and click on Buttons, Links, and Actions.
-
Click on New Button or Link ****to create the button.
.png?cb=a41ddfe10654f43a1560e3f484b35b2a)
-
Fill in the necessary information:
Label: Request bulk translation
Display Type: ****List Button
Text area: lightning/cmp/TRDOTCON__MassiveTranslationAura
.png?cb=b98eaf8ad231cbcfa8ca9da7cacff14d)
-
Click Save to apply your changes.
-
Next to List View Button Layout, click Edit.
.png?cb=15c5ab064be5864aca759a8feffeca21)
-
In the edit view, go to the Custom Buttons section.
-
Next to List View Button Layout, click Edit.
-
In the edit view, go to the Custom Buttons section and select Request bulk translation.
-
Once the button is in the Selected Buttons list, click Save to apply your changes.
.png?cb=0a37f8c51d0bccba82ae1b227c45af63)
Adding the single article translation request button to the Knowledge record page
-
Go back to the Knowledge object settings.
-
Go to Buttons, Links, and Actions.
-
Click on New Action.
.png?cb=a41ddfe10654f43a1560e3f484b35b2a)
-
Fill in the necessary information:
Action Type: Lightning Component
Lightning Component: TRDOTCON:TranslationFormHost ****
Height: 750px
Label: Request translation
-
Click Save to apply your changes.
.png?cb=db40010babb75184c6a0d1a6325bb2b4)
-
Go to Page Layouts under the Knowledge object settings.
-
Select the layout you want to edit (e.g. Knowledge Layout) and click Edit.
-
In the Page Layouts editor, locate the Quick Actions section, usually under Mobile & Lightning Actions.
-
After adding the action, click Save to apply changes to the layout.
.png?cb=c2b982820efc5b2cee97a1f31aa94117)
-
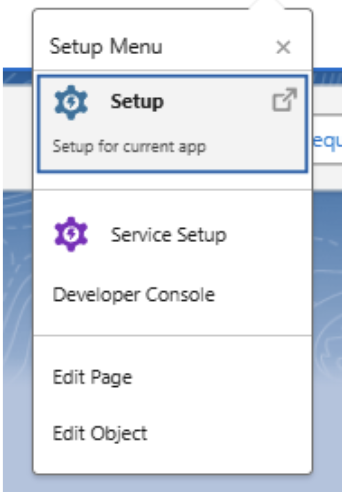
Open a Knowledge record, click on the gear icon, and choose Edit Page.
.png?cb=78aafe3ef2c6c473ccd60f16705062f6)
-
Ensure that the Highlights Panel or other components display the Request translation action as needed.
.png?cb=20a580b9374a19e916a923fa422b7461)
-
Click Save ****and Activate ****if changes were made in the Lightning App Builder.
Adding the Cancel button to the TranslationOS orders record page
-
Go to the TranslationOS orders object settings.
-
Go to Buttons, Links, and Actions.
-
Click on New Action.
.png?cb=624f2981016a4084552318447ebd2085)
-
Fill in the necessary information:
Action Type: Lightning Component
Lightning Component: ****TRDOTCON:cancelRequestAura ****
Height: 250px
Label: Cancel request
-
Click Save to apply your changes.
.png?cb=f4a3c8b80f84ad11889ba858a9655361)
-
Open the TranslationOS order record, click on the gear icon and choose Edit Page.
.png?cb=7e9c2f90ca9e73fd26b1c31ae1f1f880)
-
Ensure that the Highlights Panel or other components display the Cancel Request action as needed.
.png?cb=f6da5765db492657d719bebd1fe3d14f)
-
Drag the knowledgeTranslationRequest component in the right column.
.png?cb=df076af6041cc329dd244d49c1733f67)
-
Click Save and Activate if changes were made in the Lightning App Builder.
Using the connector
As soon as we’ve confirmed that the connector configuration is in place, you’re ready to translate your entries. The connector supports two modes: single article translation and bulk translation.
Requesting translations for single articles
Before sending entries for translation, make sure that your user was assigned the correct permission sets by the system admin.
Once you’re ready to send an article to us, click Request translation in the top right corner of the article view:
.png?cb=539c20943d1504b1c1a740fd4cf9bd7e)
When placing an order, you can:
-
select target languages;
-
choose a service type, which determines the workflow, cost and turnaround time of your translation order and is detailed in your service level agreement; and
-
optionally add instructions for translators, as well as a cost centre and purchase order that will be visible in reports, analytics and invoices.
Click Submit to send the article for translation.
|
💡 If the article was already sent out for translation, a small table with a recap of ongoing requests for the selected article will appear in the top portion of the modal, right above the language selection. Should a request be in progress, you will not be able to submit a new one until the existing one is completed and delivered to Salesforce, or cancelled. |
|---|
To see more details or cancel the order, click the tab TranslationOS orders, choose the desired order to inspect it, then finally click Cancel requests. Please note that doing so will cancel all requests included in a single order, so it is recommended to use this method only for orders containing a single article.
If you wish to cancel a single article in an bulk order instead, you should go to TranslationOS, search for the desired article and cancel it there.
Requesting translations for multiple articles
Before sending entries for translation, make sure that your user was assigned the correct permission sets by the system admin.
When you are ready to send multiple articles, click the Request bulk translation button in the top right corner of the Knowledge list view:
A table will open with the list of available articles to translate. Articles can be searched by title in the search bar. You must pick one or more articles, then click Next:
In the following screen, you need to specify the details of the order, including the desired target languages and service type.
Optionally, you can specify a cost centre and purchase order to facilitate tracking and reporting in the TranslationOS dashboard. Instructions for linguists can also be provided to enhance the quality of the translation.
Finally, you can tick the Autopublish box if you want the translation to be published as soon as it’s delivered.
|
💡While placing a bulk order, you may select articles for which a translation is already in progress. If that happens, when you place the order, a check will verify the presence of any ongoing translation requests for the selected articles and prevent you from accidentally sending a duplicate request. You will be asked whether you want to go ahead anyway and send all the articles not yet in translation. |
|---|
|
💡Autopublish will publish all translations at once as soon as the order is completed. For that to happen, the source article must already be published. If the source article is still in a draft state, the translations will be uploaded with a draft status instead. |
|---|
Monitoring translations
After clicking Request bulk translation, click the tab Requests in progress. It will show a table with all ongoing orders with summarised information, such as the current status, time of creation and service type.
To view more detailed status information, you can copy the Translated ID order and search for it in the TranslationOS dashboard.
Receiving the translated content
The translation for a given article can be viewed in the article view by picking the desired language in the View Translations box.
The status in the tab Requests in progress will also be updated.
FAQ
How do I track my assets in TranslationOS?
TranslationOS uses abstract concepts like content ID, order ID and order group ID to map your content. The values for these fields change depending on the source platform. To retrieve a Salesforce Knowledge article in TranslationOS, use the Requests or Content views in TranslationOS and search by any of the values in the table below.
|
TranslationOS ID |
Salesforce Knowledge value |
Comment |
|---|---|---|
|
Content ID |
<Knowledge kav>_<field name> |
Unique identifier of the field |
|
Order ID |
<connector order name> |
This identifier is shown in the TranslationOS orders view in Salesforce and in the Requests in progress tab when submitting a bulk translation request. |
|
Order group ID |
<article title>_<submission timestamp> |
|