Introduction
The TranslationOS connector for Phrase TMS makes it easy to entrust Translated with the professional or automated translation of your projects, saving you the hassle of importing and exporting content or switching between tools.
|
🚨Vendor management, which is required for our integration to work, is only available on Phrase’s Team plan or higher. |
|---|
This connector is fetch-based, meaning it checks Phrase TMS at a configurable interval for any content that you have marked for translation. To learn how to mark content for translation, see the section Using the connector.
Before starting to use it, you need to have a Phrase TMS account. While we don’t yet have a Phrase Strings connector, integrating Phrase Strings with Phrase TMS allows us to ingest your Phrase Strings content through Phrase TMS.
Support
For general questions about functionality, our dedicated support team can be reached at info-tos@translated.com.
If you need technical information or you’re ready to integrate Phrase TMS with TranslationOS, feel free to reach out to us at api@translated.com for assistance with onboarding.
The onboarding process may vary depending on your needs, but the following steps are a helpful guideline:
-
Translated will provide you with a vendor token, which you will use to add us as a vendor on Phrase TMS, together with a list of service types, in the event that we have agreed to more than one service level.
-
We will need you to confirm the workflow steps that will be assigned to Translated and the job status that should trigger intake. The frequency with which the connector checks for new assignments will also be decided upon.
-
Any further customisation will be discussed and implemented based on your requirements.
-
We will be ready to receive, process and deliver your translation requests!
Setting up the connector
Adding Translated as a vendor
To activate the TranslationOS connector for Phrase, you’ll need to add Translated as a vendor in your Phrase TMS instance using the vendor token you receive from us during the onboarding process.
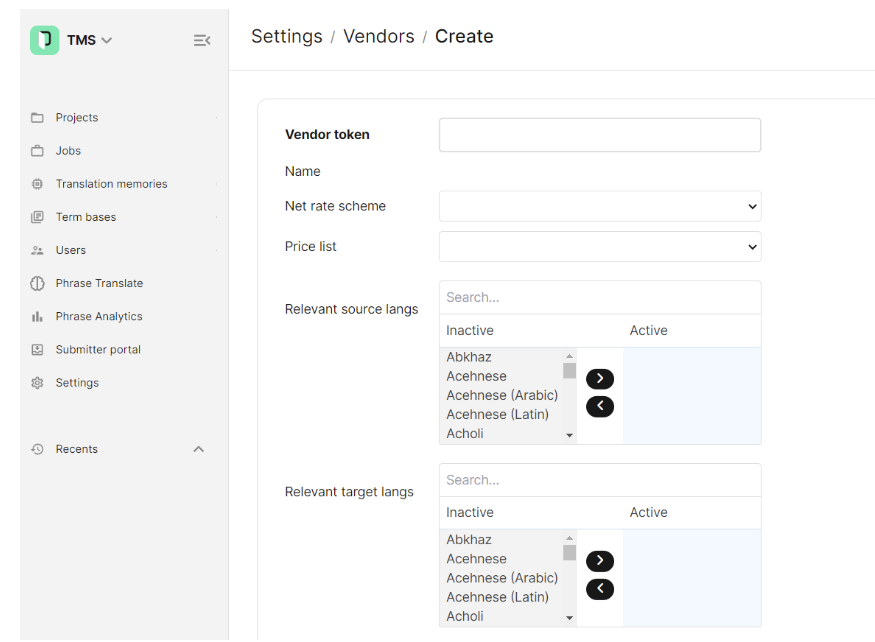
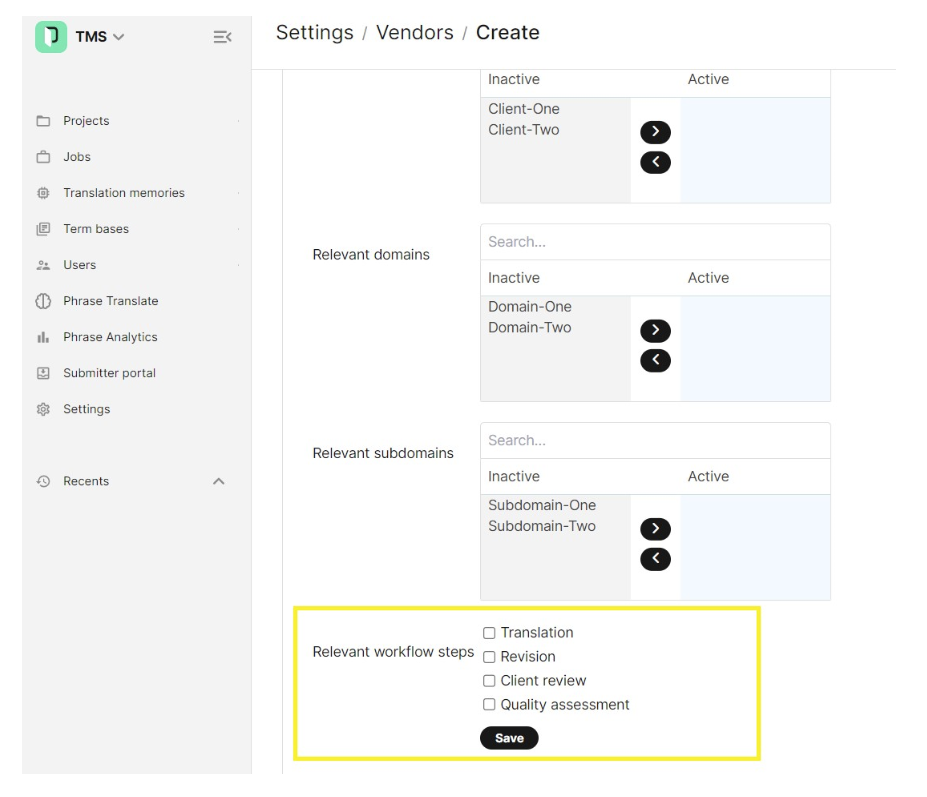
While setting Translated up as a vendor, you’ll need to select all the workflow steps you envision assigning to us across all projects. You can do this in the Relevant workflow steps section.
Incremental delivery
By default the connector populates all the workflow steps in the corresponding jobs assigned to the vendor instance with the final translation. However, individual Phrase workflow steps can be mapped to specific Translated job types so that the connector uploads the translation as it is upon delivery of each job.
Configuring a method to select a service type
Before you start using the connector, you need to agree with Translated on at least one service type. The service type defines the workflow, costs and turnaround time applied to your orders. All these details are included in the service level agreement (SLA).
You can choose from, or combine, three different methods to request a particular service type for order processing.
Default: if you only have one service type, or you want to set a fallback option, you can ask us to configure a default value.
Field mapping: you can ask us to configure a mapping between the values of a field in Phrase and the service types. For example, if you have a "Content Type" field and you will always request the service type "premium" for "Product UI" content, this method facilitates automation.
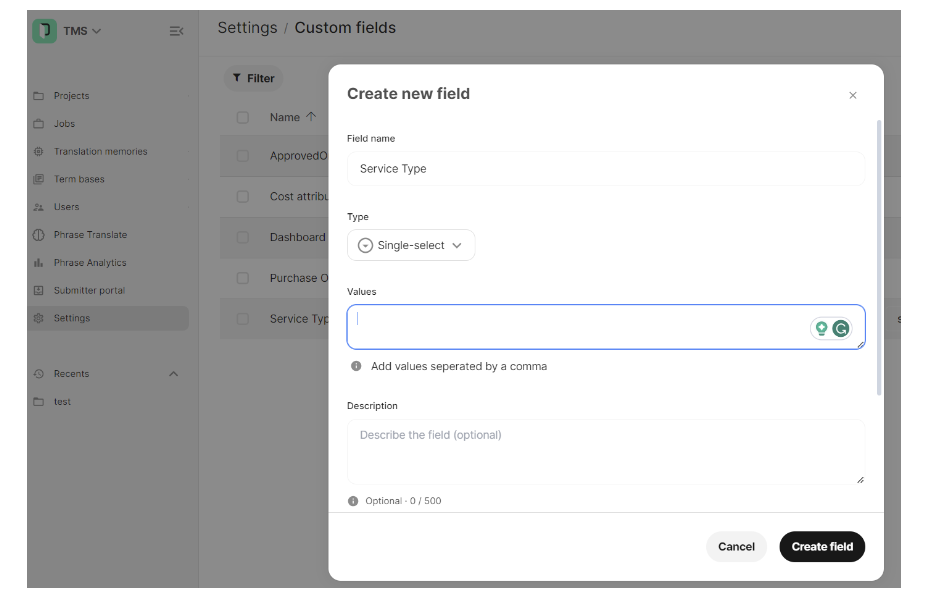
Dedicated custom field: if you have multiple service types, or ones that can’t be mapped, and you want to select your service type on a case-by-case basis or be able to override the configuration of the field mapping, for example to request an “urgent” service, we recommend using this method, which entails creating a dedicate custom field named “Service Type” as follows:
-
Click on Settings > Custom fields
-
Type Service Type into Field name. Note that it is case-sensitive.
-
Select Single-select under Type
-
Enter the values into the Values field, separated by a comma.
Using the connector
Setting up projects
When creating projects on Phrase, all the information that needs to be sent to TranslationOS must be configured in the Metadata section.
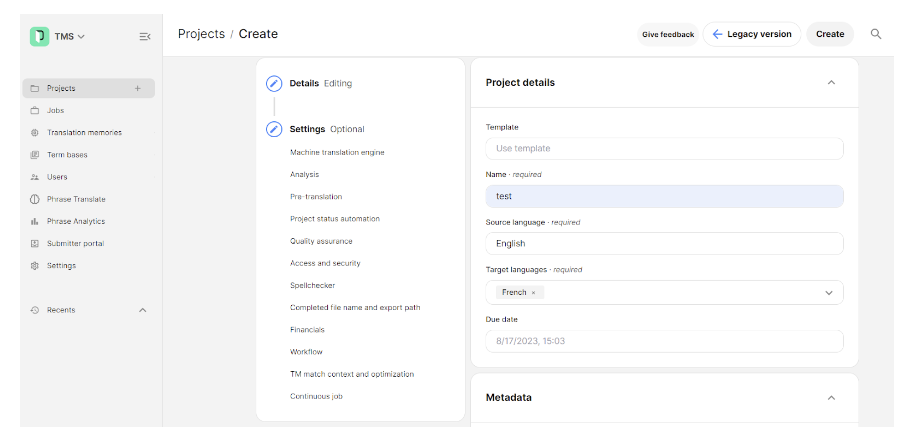
Here you can request a specific service type for your project, based on the configuration described earlier. If no service type is selected, the connector will apply a default value.
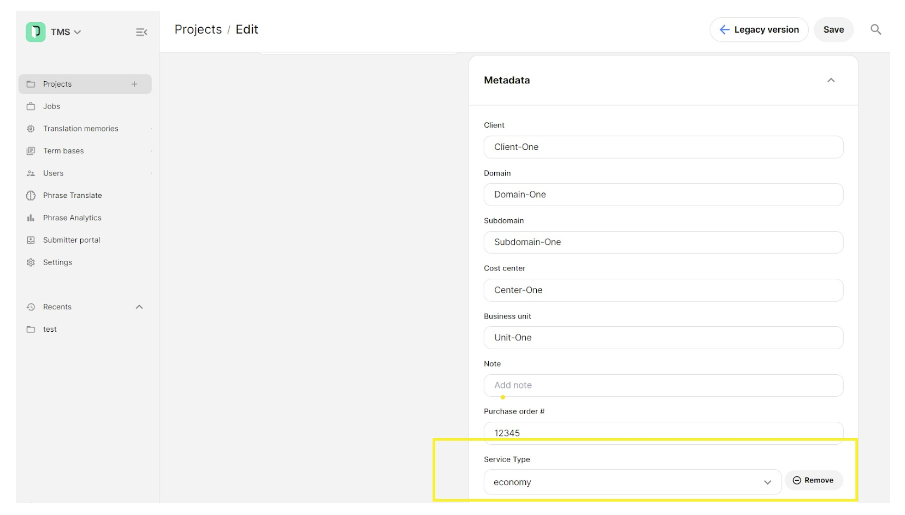
In addition to this field, you may wish to pass along information such as the cost center or PO number for the project by means of an existing or custom field. The reason for this requirement is that some metadata isn’t transferred to the vendor account during assignment. Here are some examples:
-
Owner: The value of this existing field is transferred to TranslationOS by default.
-
Purchase order: The value of this existing field is transferred to TranslationOS by default.
-
Cost center: To transfer this information, you’ll need to create a custom field. The default configuration expects Cost Center, but you can name the field as you wish. Just let us know what you’ve chosen and we’ll take care of the configuration on our end.
-
Client and other metadata: The client and any other meta-information that you would like to be sent to us can be included in the project by means of custom fields. Just let us know what you’ve named them and we’ll take care of the configuration on our end.
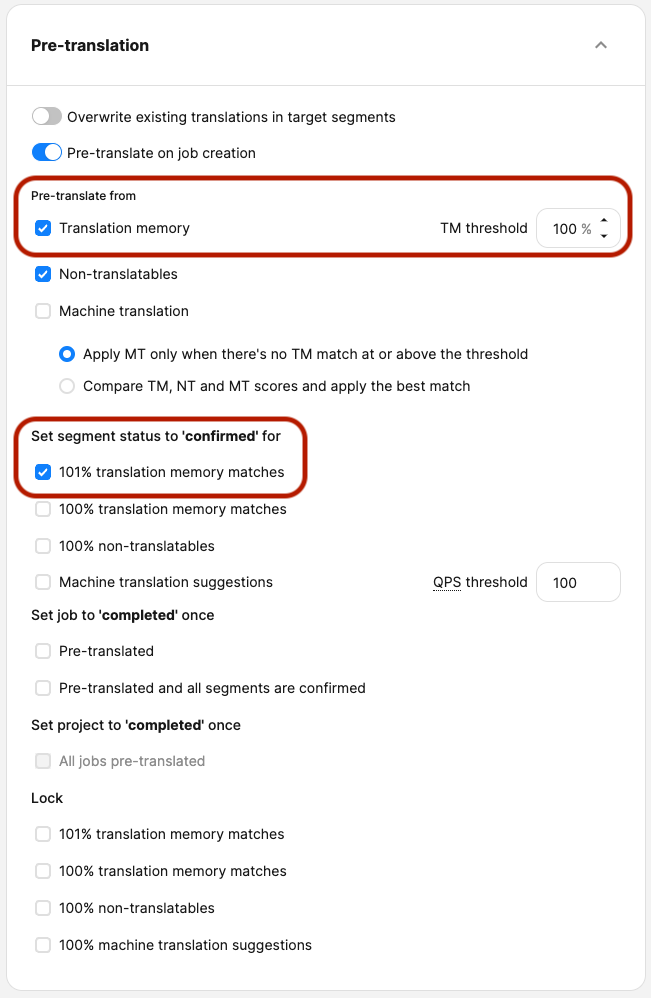
Pre-translation settings
It is required to configure the Pre-translation settings as follows. In particular:
-
Select Pre-translate from translation memory and set TM threshold to 100%
-
Set segment status to confirmed for 101% translation memory matches only
-
Do not enable pre-translation of machine translation
The connector also offers TM synchronisation functionality that retrieves high-quality matches from your Phrase TMs for each segment, though the above settings ensure reliable handling of exact matches.
Workflow steps
Select the steps you want to assign to Translated in the Workflow section.
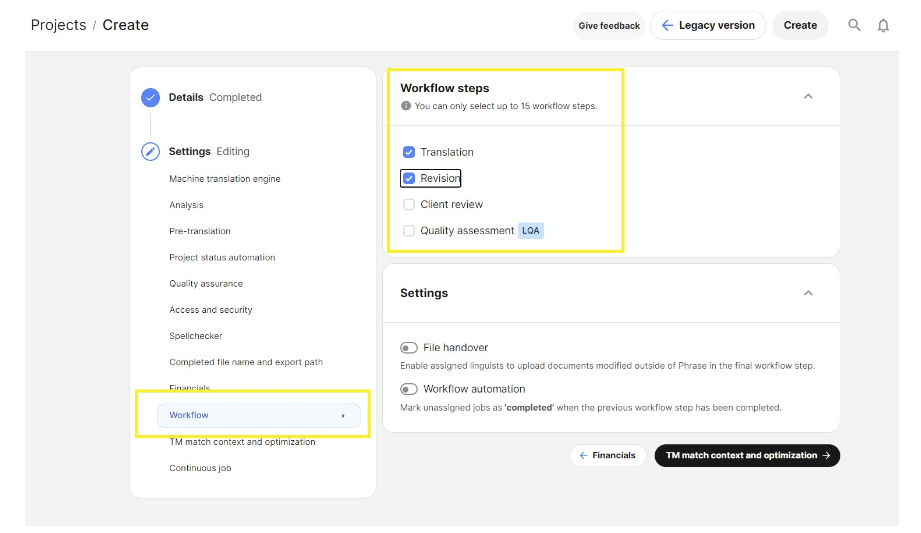
It is vital to select all the workflow steps that need to be handled by Translated so that the connector can deliver them correctly.
Assigning jobs
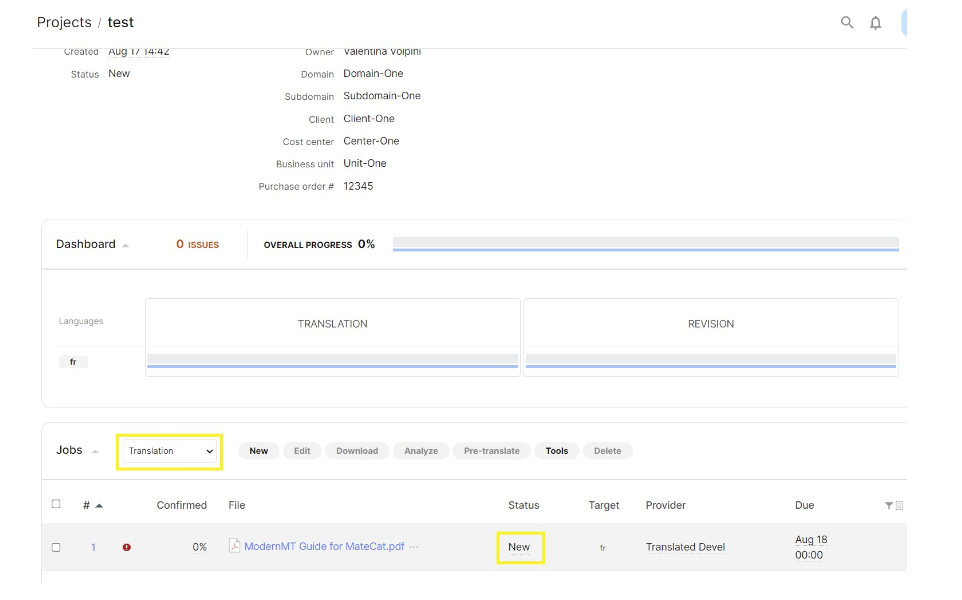
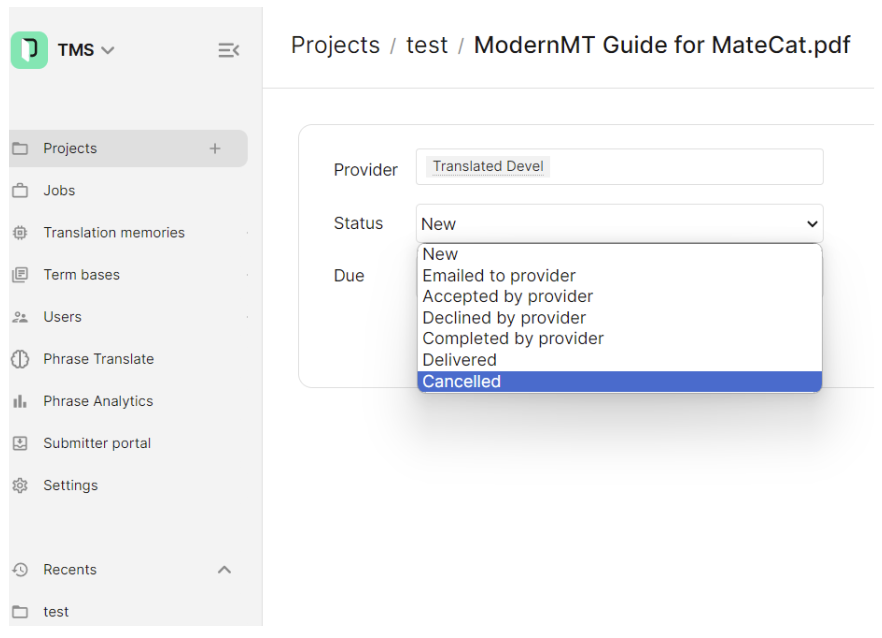
During onboarding, it will be agreed on how to assign jobs to Translated. In addition to selecting us as the provider, you may opt to set the job status to either New or Emailed to provider, each of which has implications.
By setting the connector to process jobs in the New status, you would put in place a continuous localisation workflow, as no manual changes would need to be made for the connector to take action.
If you opt for the connector to act only on jobs with the status Emailed to provider, a user or automation tool would need to change their status before the connector could process them. This favours content gating.
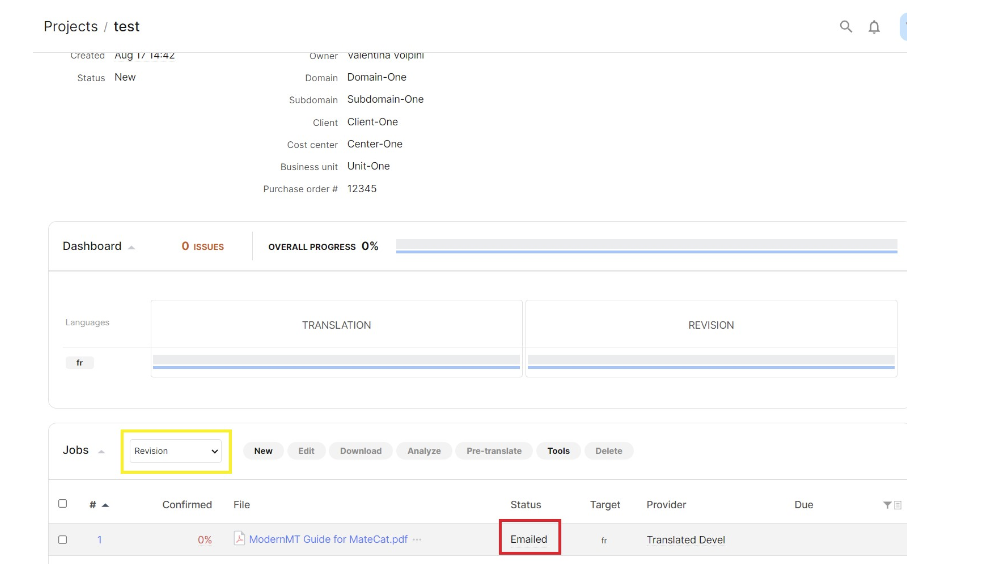
It is, however, essential to set the same job status across all the workflow steps assigned to Translated. In the example below, notice that the status of the translation and revision jobs is different. This would prevent correct delivery.
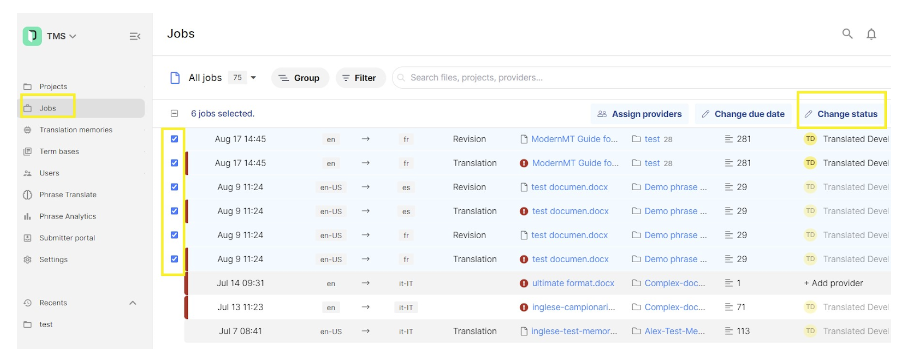
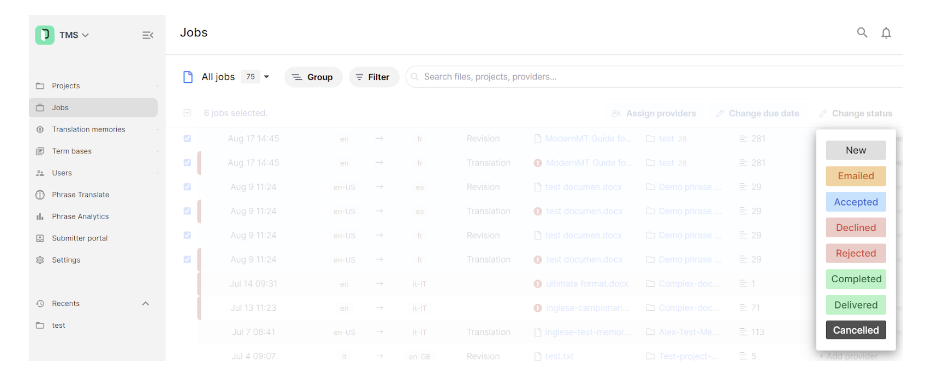
The status of jobs can also be modified from the Jobs view, where you can select multiple jobs and change their status in bulk.
How the connector processes the jobs
Once a project has been created and jobs have been assigned to Translated, we receive them on our Phrase instance. The connector regularly checks whether there are new jobs to process, taking into account the status configured to trigger intake.
Once the connector has processed the jobs assigned to Translated, it changes the status of the jobs to Accepted.
As jobs are completed and delivered, the connector updates their status on Phrase to Completed by provider.
Cancelling jobs
You can autonomously request the deletion of a job that meets one of the following criteria:
-
The job hasn’t yet been processed by the connector. In other words, its status is not Accepted.
-
The job has been processed by the connector, but the TranslationOS requests are not yet in progress. This needs to be confirmed on the TranslationOS dashboards.
You can do so by changing the status of the job to Cancelled on Phrase.
If the job you wish to cancel is already in progress on TranslationOS, you need to get in touch with the relevant project manager.
FAQ
Does setting a job’s status to Cancelled prevent delivery?
If the job hasn’t been deleted and is still assigned to the vendor instance, and the TranslationOS requests weren’t canceled (because they were already in progress when the connector next polled the vendor instance), the Cancelled status doesn’t prevent delivery. The connector will successfully upload the translations and change the job’s status to Completed.
How do character limit checks work?
The connector doesn’t accept jobs where the source text in any segment surpasses the character limit for that segment. When this occurs, the job status is changed to Declined to prevent repeated ingestion attempts.
Are split jobs supported?
Yes. However, when splitting files, ensure that you tick Split file in all workflow steps.
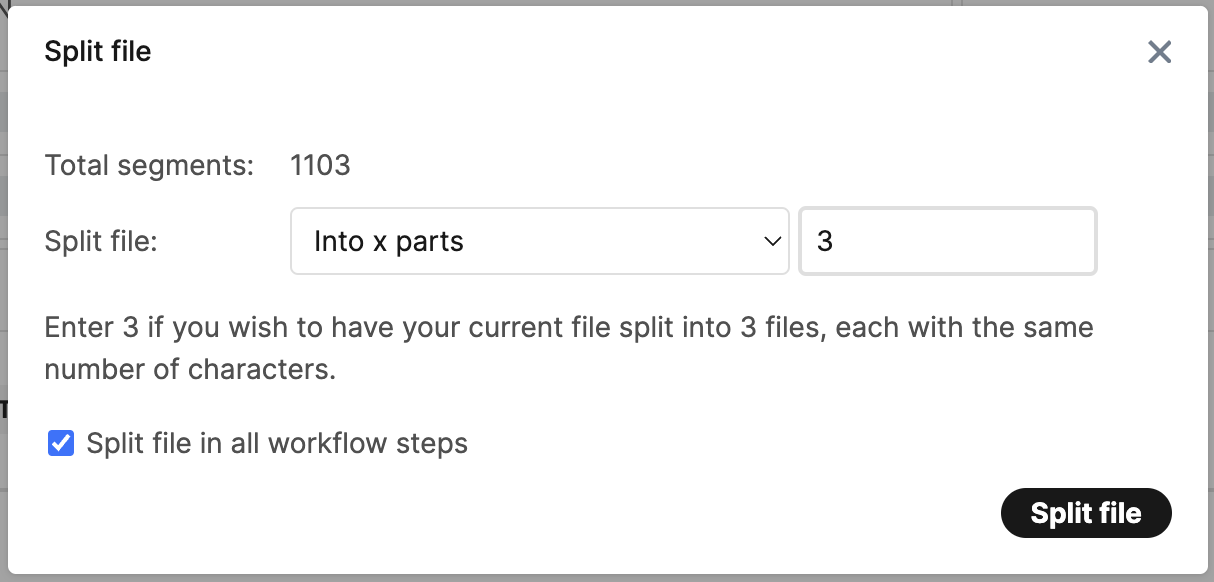
If a file is split in only one workflow step, that workflow step will be handled as expected, but the status of the jobs in the other workflow steps will be set to Completed as soon as the first split job is delivered, even though the delivery is only partial.
Are project references provided as context for translators?
Yes. All reference material, which appears in the References section of the Phrase project, is imported and provided to translators.