Introduction
The TranslationOS connector for Zendesk makes it easy to entrust Translated with the professional or automated translation of your articles, categories, sections (Guide) and dynamic content (Support), saving you the hassle of importing and exporting content or switching between tools.
This connector is fetch-based, meaning it checks Zendesk at a configurable interval for any content that you have marked for translation. To learn how to mark content for translation, see the section Using the connector.
Support
For general questions about functionality, our dedicated support team can be reached at info-tos@translated.com.
If you need technical information or you’re ready to integrate your Zendesk instance with TranslationOS, feel free to reach out to us at api@translated.com for assistance with onboarding.
The onboarding process may vary depending on your needs, but the following steps are a helpful guideline:
-
Translated will ask you to provide authentication credentials (see below for instructions to retrieve them).
-
Translated will enable you to test the connector in sandbox mode, which means that you will get back machine-translated content to test the user experience.
-
You will agree with Translated on the required service levels, also known as service types. Translated will take care of configuring the connector for you.
-
We will be ready to receive, process and deliver your translation requests!
Setting up the connector
You will need to retrieve authentication credentials and send them to us, as well as do some configuration in the Guide and Support modules, depending on the content you need to have translated.
To begin, log in to Zendesk with an account which has read and write access to the articles you intend to have translated. The connector will impersonate this user.
Retrieving authentication credentials
Before obtaining the necessary authentication credentials, identify your Zendesk domain, which corresponds to the bolded part of the Zendesk URL: https://domain.zendesk.com.
With that out of the way, you’ll need to decide whether the connector should use basic or OAuth authentication. We recommend OAuth for better security.
Basic authentication
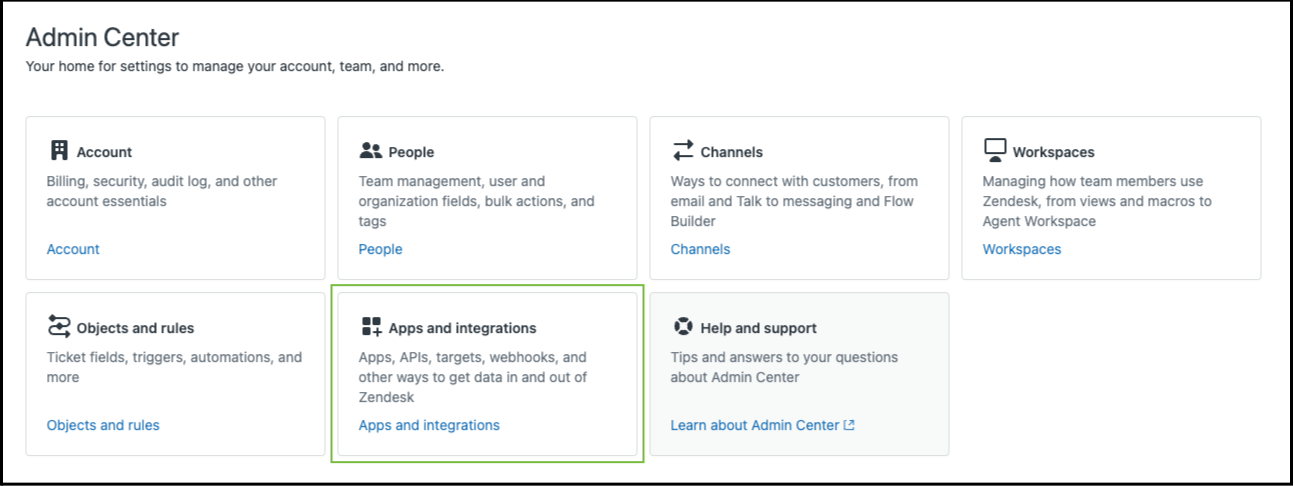
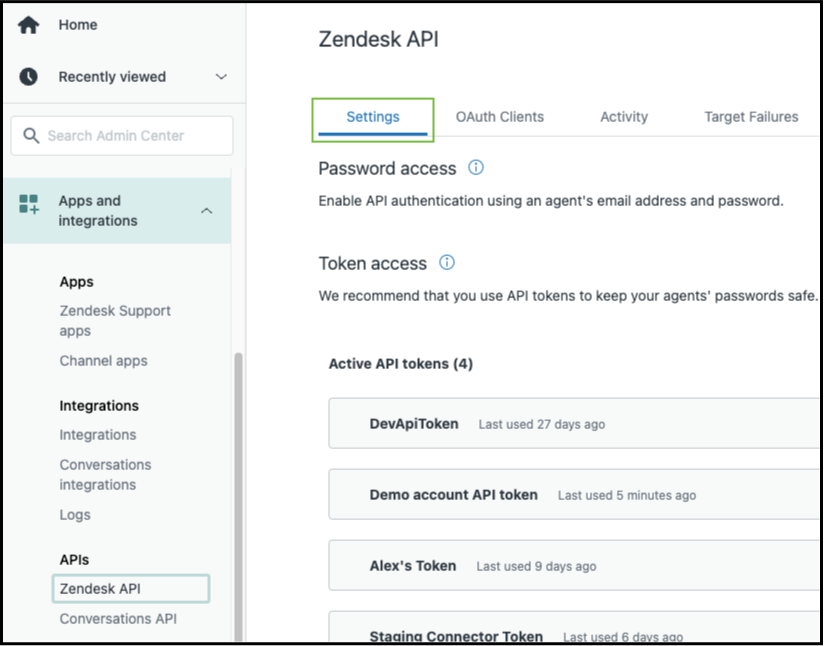
For basic authentication, we require your email address and an API token. To generate an API token, navigate to Admin Center > Apps and integrations > Zendesk API > Settings.
Here, enable Token access, then click Add API token.
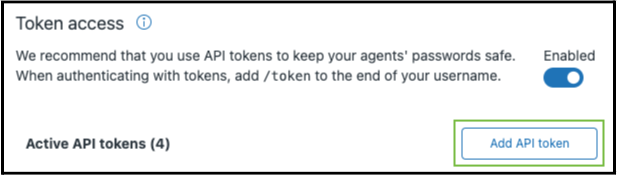
Give the token a name, copy it and click Save.
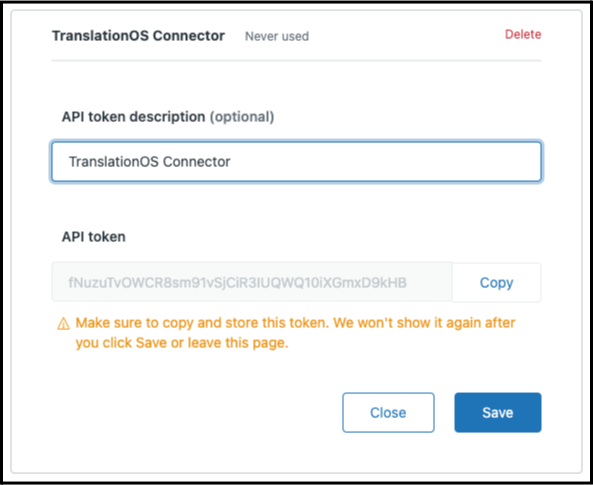
Send us the following information:
-
Your Zendesk domain.
-
The email address of the user with which the API token was generated, i.e. the user which the connector will impersonate.
-
The API token.
OAuth authentication
For OAuth authentication, we require an OAuth2 token. Follow this guide to create it, then send us the following information:
-
Your Zendesk domain.
-
The OAuth2 token, which corresponds to the full_token property mentioned in the guide.
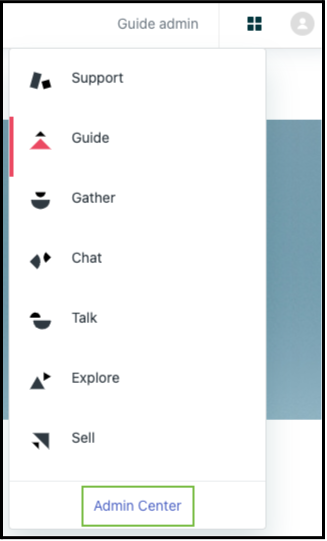
Setting up Guide
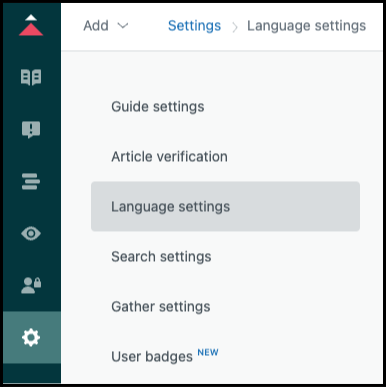
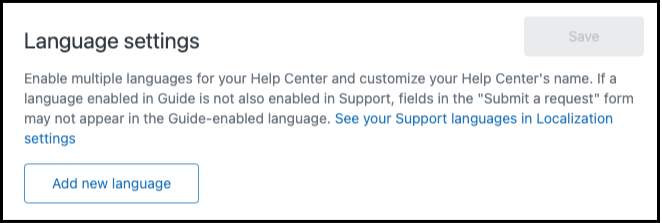
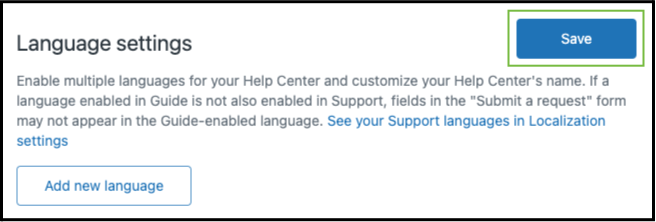
To get your Guide module ready for translation, you’ll need to add all languages into which you expect to request translations. To do this, navigate to Guide admin > Settings > Language settings.

If not all languages are present in the list, click Add new language.
Select the desired language from the drop-down. Choose the variant specifying the region (e.g. Portuguese (Portugal) rather than Portuguese), where possible.
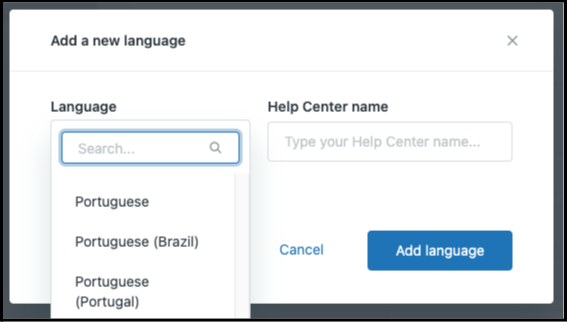
Click Add language, then click Save.
Also let us know whether you would prefer categories and sections to be translated automatically or manually so that we can configure your connector accordingly.
Setting up Support
To prepare your Support module for translation, you’ll need to configure a default source language and select all the languages into which you expect to request translations.
To configure the default source language, navigate to Admin Center > Account > Localization.
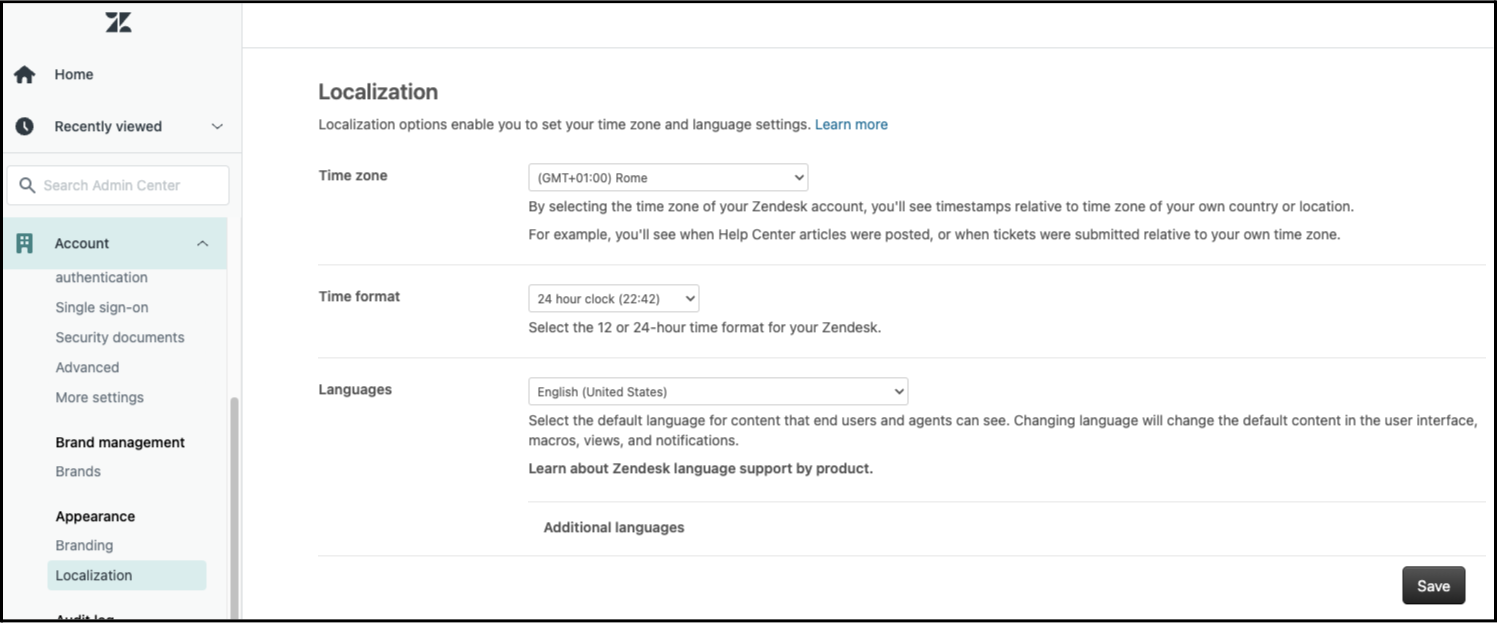
Select a language in the Languages drop-down, then click Save.
Now it’s time to select your desired target languages. In the same view as above, click Additional languages.
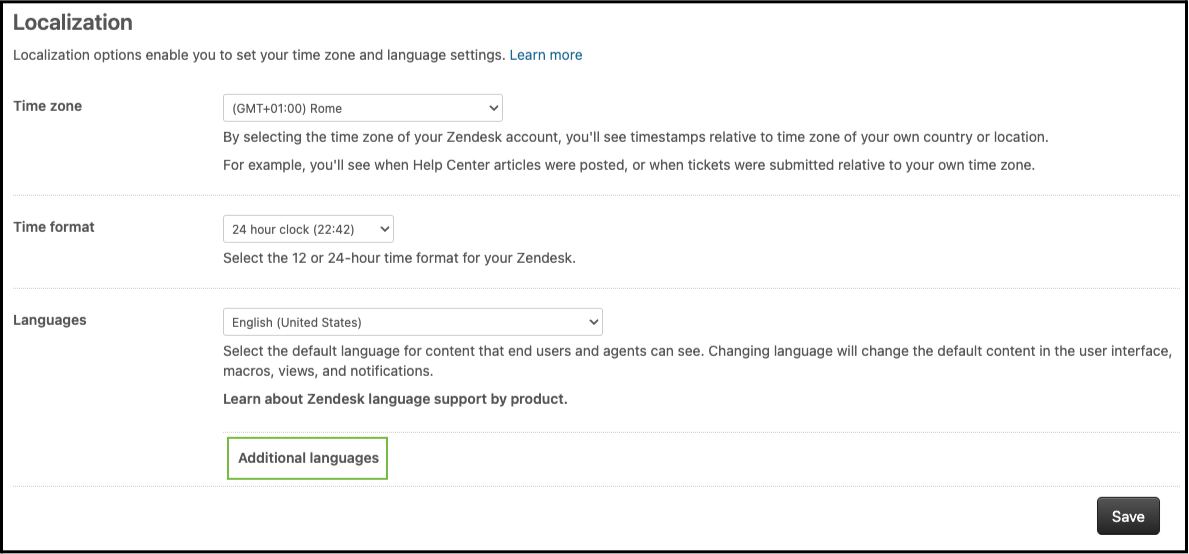
Tick the boxes alongside the desired languages, choosing the variant specifying the region (e.g. Portuguese (Portugal) rather than Portuguese), where possible, then click Save.
Using the connector
Requesting translations from Guide
-
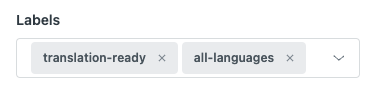
To mark an article for translation, open it, click Article settings and follow these steps:
-
Add a translation-ready label.
-
If you want the article translated into all the languages configured on your Zendesk account, you can simply add the label all-languages or all_languages. This is the preferred option where possible, given a known issue with Zendesk's API.
-
If you want the article translated into specific languages, add one or more lang_<language_code> labels, where <language_code> is the Zendesk code for the language into which you want to translate the article. This article lists the language codes corresponding to the language names shown in the Zendesk UI.
.png?cb=b06eb84fa95a57a04abd9724831cca47)
-
If you want to select a specific service type, see this FAQ.
-
-
If it’s the first time you’re sending a particular article for translation, it may be in the Draft publication status. After the first translation, the article must be published before the connector fetches it, otherwise the previously published version of the source content will be ingested.
-
The connector fetches all correctly-tagged articles and submits the title and body to the TranslationOS API for translation.
-
It may also send categories and sections for translation, depending on the connector configuration.
-
-
The translation-ready label is removed.
-
Any tos_translated_<language_code> labels present for the requested languages are removed.
-
A lang_<language_code>_in_progress label is added to the article for each valid requested language. For invalid languages, error_<language_code> labels are added, and those languages fail.
.png?cb=e15b57ab55dc39e1a4bb59d2057c11c5)
Requesting translations from Support
Assignment is largely automated, as the connector only handles dynamic content items and variants in the Active status. When outdated variants are detected by the connector, the content of the variant in the default language is sent to translation. The status of the outdated variants is set to Active (even though the content hasn’t yet been updated) to prevent repeated intake.
New dynamic content
When new dynamic content in the Active status is detected by the connector:
-
The content in the item’s default language (which may differ from the default language in Admin Center) is sent for translation into all the other languages.
-
Variant items in the Inactive status (guaranteeing that they aren’t used by Zendesk) are created with the placeholder content defined in the In progress label field in the connector configuration.
-
Modifications of the variant in the default language are no longer detected at this stage. It is recommended to wait until after delivery of the translations to make changes. If you need more time to compose your dynamic item and plan to edit it several times, set its status to Inactive.
Modified dynamic content
When the content in the default language of a translated dynamic content item is modified, Zendesk marks all the variants in the other languages as Active (Out of date). The content of these variants is still used by Zendesk.
The connector detects all Active (Out of date) variants and intakes them for translation. It also adds a trailing space to the content of these variants so that they’re no longer considered outdated. This prevents them from being intaken again at the next poll.
Receiving the translated content in Guide
The translation is delivered as a draft Zendesk translation of the article, and the translations of all associated categories and sections are uploaded as well. The lang_<language_code>_in_progress labels are also removed. If enabled in our configuration for your connector, tos_translated_<language_code> labels are added.
Receiving the translated content in Support
The variant content is updated and its status is set to Active, making the translation usable by Zendesk.
If a variant is manually deleted after delivery, the source content is resent for translation into the language of the deleted variant. If this isn’t desired, simply set the status to Inactive instead of deleting the variant.
Cancelling translations
In-queue requests can be cancelled on TranslationOS. All other cancellation requests require the intervention of the project manager.
Known issues
Unreliable API
The article labels returned by the Zendesk API are often incomplete, meaning that when you add labels to request specific target languages, our connector may not receive all of them. The issue is being investigated by Zendesk’s support team. There is currently no workaround other than to delete the labels of the languages not ingested and try adding them again.
FAQ
How do I track my assets in TranslationOS?
TranslationOS uses abstract concepts like content ID, order ID and order group ID to map your content. The values for these fields change depending on the source platform. To retrieve a Zendesk asset in TranslationOS, use the Requests or Content views in TranslationOS and search by any of the values in the table below.
Guide: Articles
|
TranslationOS ID |
Zendesk value |
|---|---|
|
Content ID |
<article ID> |
|
Order ID |
Article |
|
Order group ID |
Guide |
Guide: Sections
|
TranslationOS ID |
Zendesk value |
|---|---|
|
Content ID |
<section ID> |
|
Order ID |
Section |
|
Order group ID |
Guide |
Guide: Categories
|
TranslationOS ID |
Zendesk value |
|---|---|
|
Content ID |
<category ID> |
|
Order ID |
Category |
|
Order group ID |
Guide |
Support
|
TranslationOS ID |
Zendesk value |
|---|---|
|
Content ID |
<dynamic content item ID> |
|
Order ID |
Dynamic |
|
Order group ID |
Support |
How can I select a service type?
You can add the label st_<service type name> or st-<service type name> to Guide articles to use a service type other than the default.
If the service type name is invalid:
-
the article is not ingested,
-
an error notification is sent,
-
the service type label is replaced with the label error_<service type name>, and
-
the translation-ready label is removed to prevent future ingestion with the default service type.
Category and section names are processed with the default service type.
Support content, i.e. dynamic content, is always ingested with the default service type specified in the connector configuration.
How can I send categories and sections for translation?
Our Zendesk connector can be configured to process categories and sections automatically or manually.
In automatic mode, the connector fetches and processes all categories and sections associated with articles flagged for translation.
In manual mode the connector only ingests categories and sections marked as outdated. At intake, the Mark as outdated box is unticked to prevent repeated ingestion.
How can I determine if the content of outdated variants is being translated?
There is currently no indication on Zendesk that an outdated variant is being translated. You need to consult the TranslationOS dashboards.
Is it possible to select specific dynamic content items to be sent for translation?
No. The connector only supports continuous localisation for dynamic content.
I’m translating dynamic content in five languages but I would like to temporarily translate into one language only. Is it possible to temporarily update the settings in the Admin Center?
Unfortunately not.
How are images and URLs handled?
The connector retains all images and URLs from the source article in the translated versions and supports translating the alt attribute of images. However, it does not currently support the automatic use of localised assets or URL adaptation.